How to Use Article Search in svEye: Build Custom Queries with OSINT Data
What this tutorial is about
- Article Search is where svEye turns into a power-user tool.
- It lets you build precise queries across global OSINT.
- This tutorial shows how to move from keywords to structured intelligence.
When to use Article Search
Use Article Search when you want to:
- monitor specific risks, topics, or narratives
- build repeatable intelligence queries
- go beyond basic entity search
Typical use cases:
- risk & threat monitoring
- compliance and adverse media
- geopolitical and market analysis
Video walkthrough⬈
What you’ll see in the video:
- how to build a query step by step
- how NER and categories work
- how to refine results using operators
Step-by-step: How Article Search works
Step 1: Open Article Search
- Navigate to Article Search to build a custom query.
- This mode gives you full control over what you track.
Step 2: Start typing your query
- Enter keywords, company names, or topics.
- svEye instantly suggests relevant entities and categories.
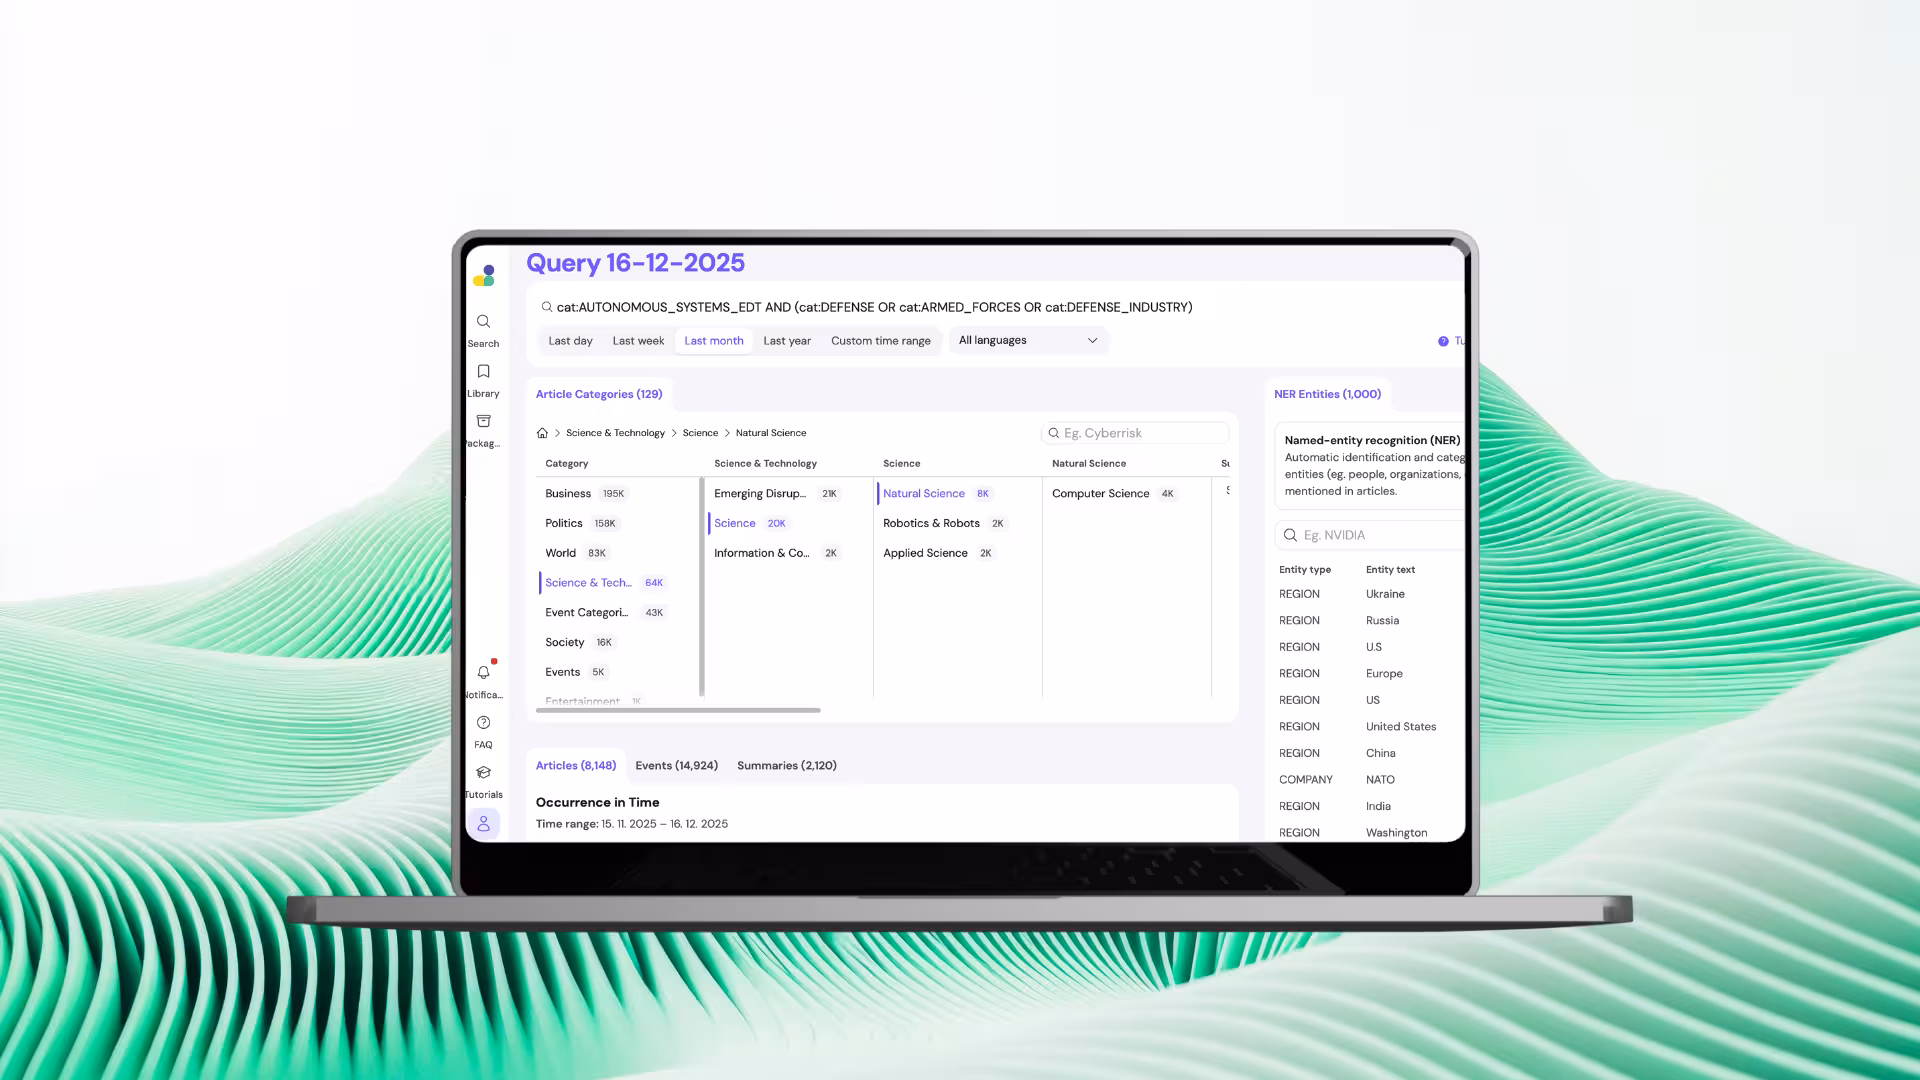
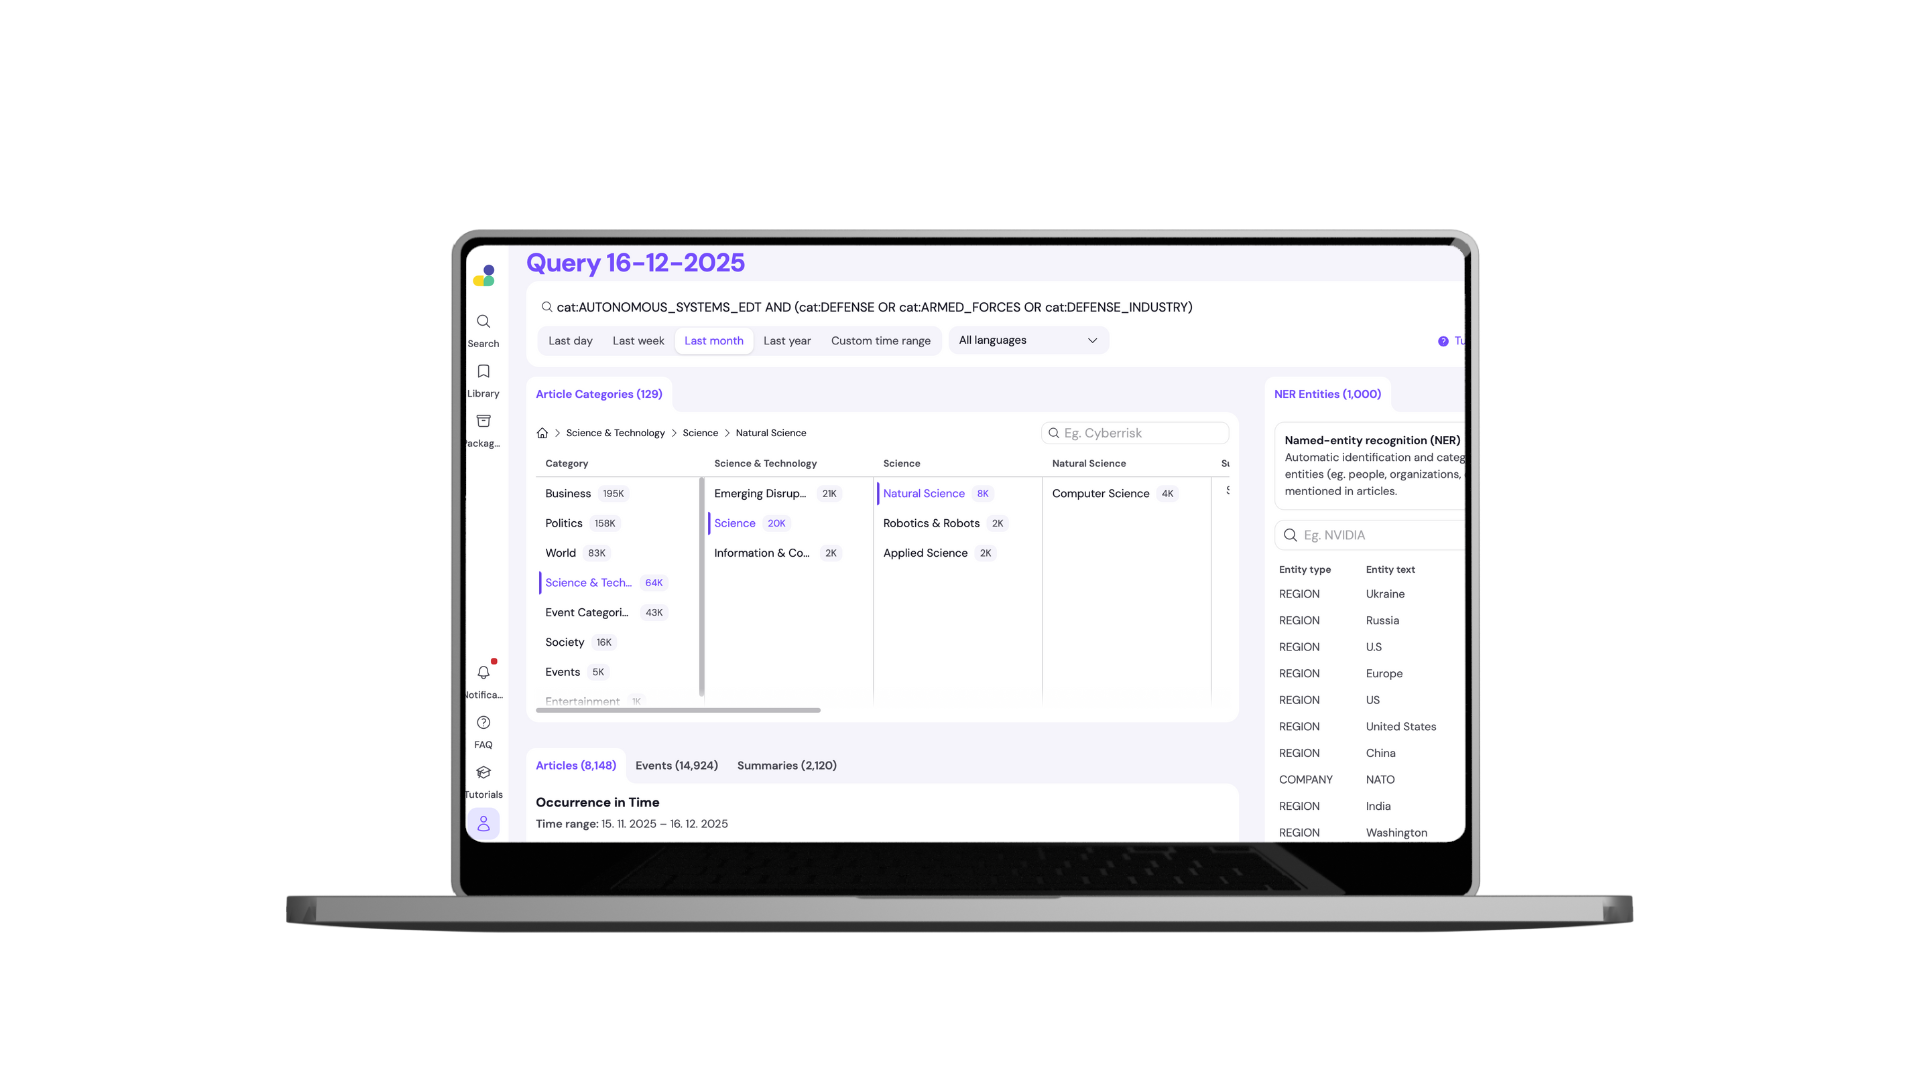
Step 3: Explore all mentions and categories
- See how your topic appears across articles.
- Review all detected categories before narrowing down.
Step 4: Refine using NER (Named Entity Recognition)
- Narrow your search to specific:
- companies
- locations
- This removes ambiguity and noise.
Step 5: Use Boolean operators
- Combine logic using AND / OR / NOT.
- Build queries that:
- expand scope
- narrow focus
- exclude irrelevant results
Step 6: Find operators next to each item
- Operators are available directly next to categories and entities.
- No need to write complex syntax manually.
Step 7: Browse categories in a tree structure
- Categories are organized hierarchically.
- Start broad, then drill down step by step.
Step 8: Let relevance guide you
- At each level, only categories relevant to your query remain visible.
- This keeps refinement fast and intuitive.
Step 9: Add selected items to your query
- Once you find what you need, add it using operators.
- Your query logic updates instantly.
Step 10: Confirm your query
- Lock in your selection before running the search.
Step 11: Run the refined search
- Execute the query to see results based on your logic.
- This becomes the foundation for monitoring and alerts.
Understanding your results
- Results include:
- interactive timeline
- detected articles
- event and category context
- You can open any article for full detail.
Best practices & tips
- Start broad, then refine using NER.
- Use OR to explore, AND to focus, NOT to clean noise.
- Save strong queries for reuse and alerts.
Related tutorials

How to Use Company Health Score: Monitor Supplier Risk in Real-Time

How to Use Library & Alerts in svEye: Monitor What Matters Automatically

How to Analyze Value Chains in svEye: See Suppliers, Tiers, and Risk Exposure
See Everything. Focus on What Matters.
svEye™ filters the noise to uncover meaningful patterns and insights. Gain clarity, stay informed, and drive smarter decisions with a comprehensive overview.

